Charles Web Proxy
If you need to test an integration to make sure your game is making the right network calls to Chartboost, use a Web debugging proxy like Charles – which you can try for free – to do it.
Setting Up Charles on Your Computer 🔗
- Download Charles Proxy, then install and launch the program
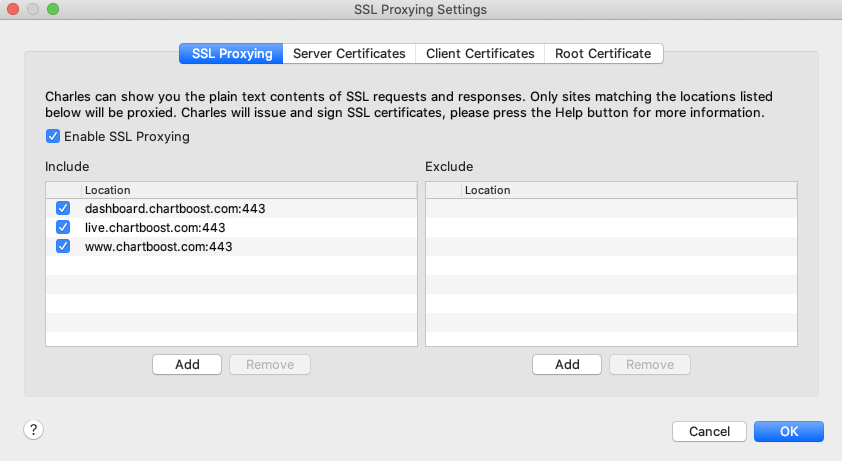
- Open the Proxy Settings menu (Proxy > SSL Proxy Settings > SSL Proxying) and check Enable SSL Proxying. After that, add and check the new locations (combination or host name and port) as shown below:
Setting Up Charles on Your Mobile Device 🔗
Because all of our iOS and Android SDKs require an SSL proxying certificate, you’ll need to download one and add it to your test devices – this lets the Charles SSL HTTPS request make it to our servers.
To start, download the Charles Proxying Certificate, then see below for OS-specific instructions.
Adding the Certificate to Android Devices 🔗
Things are simple on the Android side – you’ll just need to copy the certificate to your mobile device, then open it with any file explorer app. (Note: Some Android devices won’t be able to install the certificate – if you run into this problem, contact us for assistance.)
Adding the Certificate to iOS Devices 🔗
- First, send the certificate to an email address that has already been added to your iOS device’s Mail app
- Next, launch the Mail app on your device and open the email with the Charles Proxy attachment
- Finally, just tap on the attachment – you’ll be prompted to install the certificate
Note that on iOS 10 and later you must then go into Settings > General > About > Certificate Trust Settings and enable the Charles certificate to be trusted.
Configure SSL Proxy in your mobile app 🔗
This section applies only for Android applications.
In order for Charles to record your application SSL traffic, the following setup is required.
-
Add the following under the path
res/xml/network_security_config.xml<network-security-config> <debug-overrides> <trust-anchors> <!-- Trust user added CAs while debuggable only --> <certificates src="user" /> </trust-anchors> </debug-overrides> </network-security-config> -
Add the following reference to your AndroidManifest.xml
<?xml version="1.0" encoding="utf-8"?> <manifest ... > <application android:networkSecurityConfig="@xml/network_security_config" ... > ... </application> </manifest> -
In Charles, navigate to Proxy > SSL Proxy Settings > SSL Proxying and add the following domains:
 http://live.chartboost.com/
 http://api.chartboost.com/
 http://da.chartboost.com/
Testing Your Chartboost Integration 🔗
Once you’re all set up, use the steps below to get ready for each testing session:
- Connect your computer and mobile device to the same WiFi network, and make sure Charles is running
- Open your device’s advanced WiFi settings and set the HTTP proxy as Manual. Enter your computer’s IP address as the server, and use port 8888.
- Add a filter for Chartboost to isolate calls to our system, then launch your game on your mobile device
Interpreting Charles Results 🔗
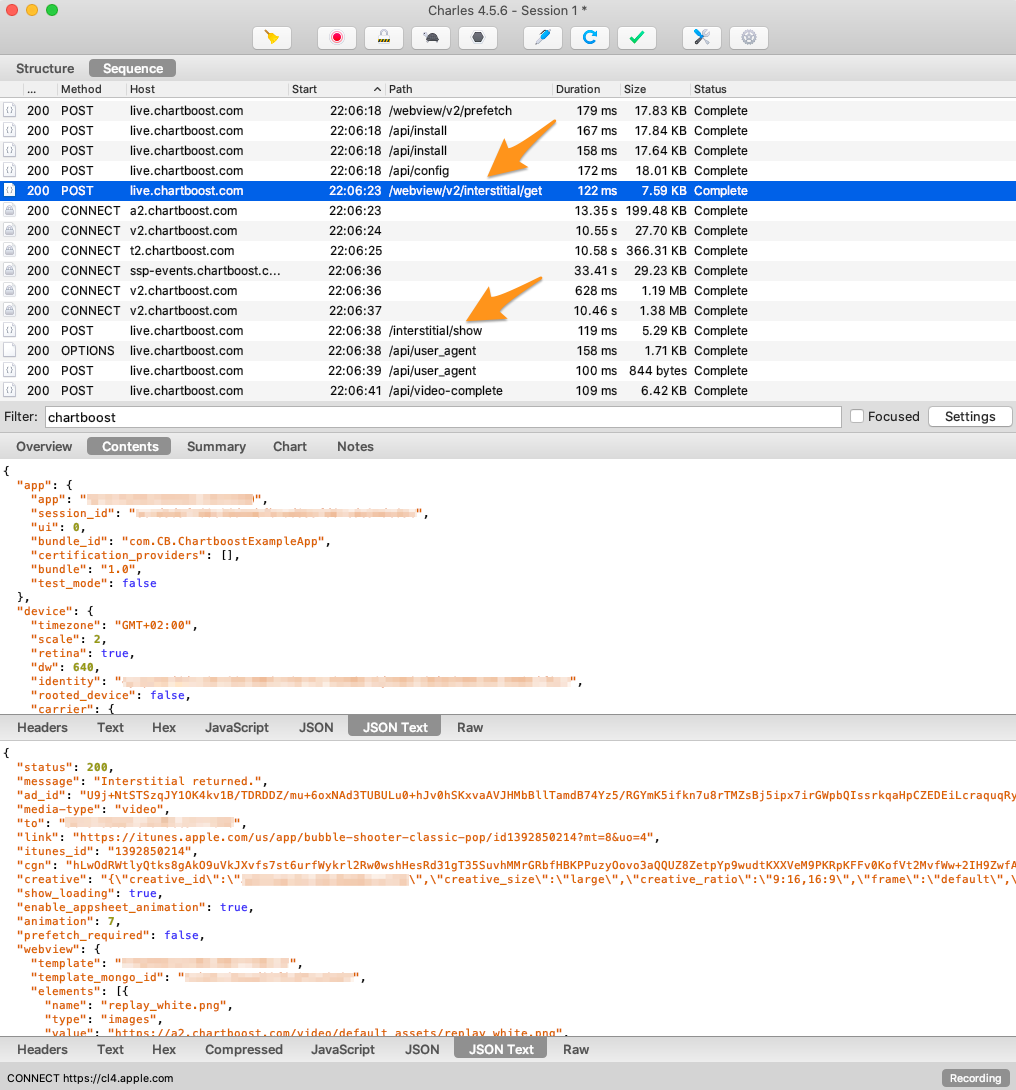
The very first calls you should see – provided you filtered for Chartboost as mentioned above – is the Chartboost initialization calls:
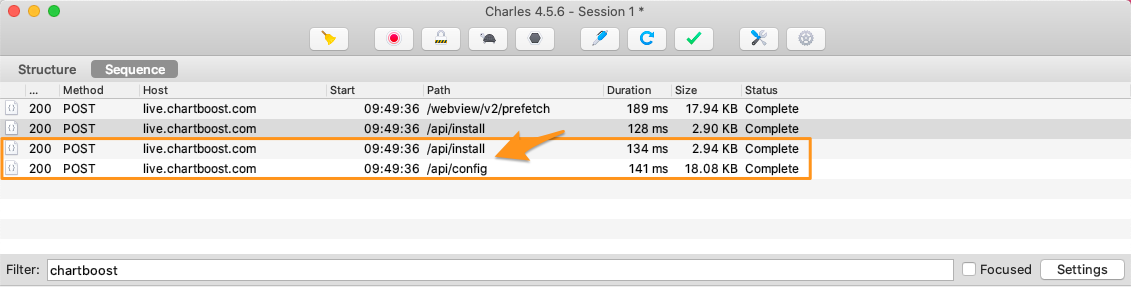
This is how the initialization calls you’ve added to your code should appear. Because our system needs to receive these calls on every bootup to accurately convert installs and track performance, they must not be dependent on prior network requests or user actions.
After logging these calls, you can consult the content of the same and the respective responses in the lower panel as shown below:
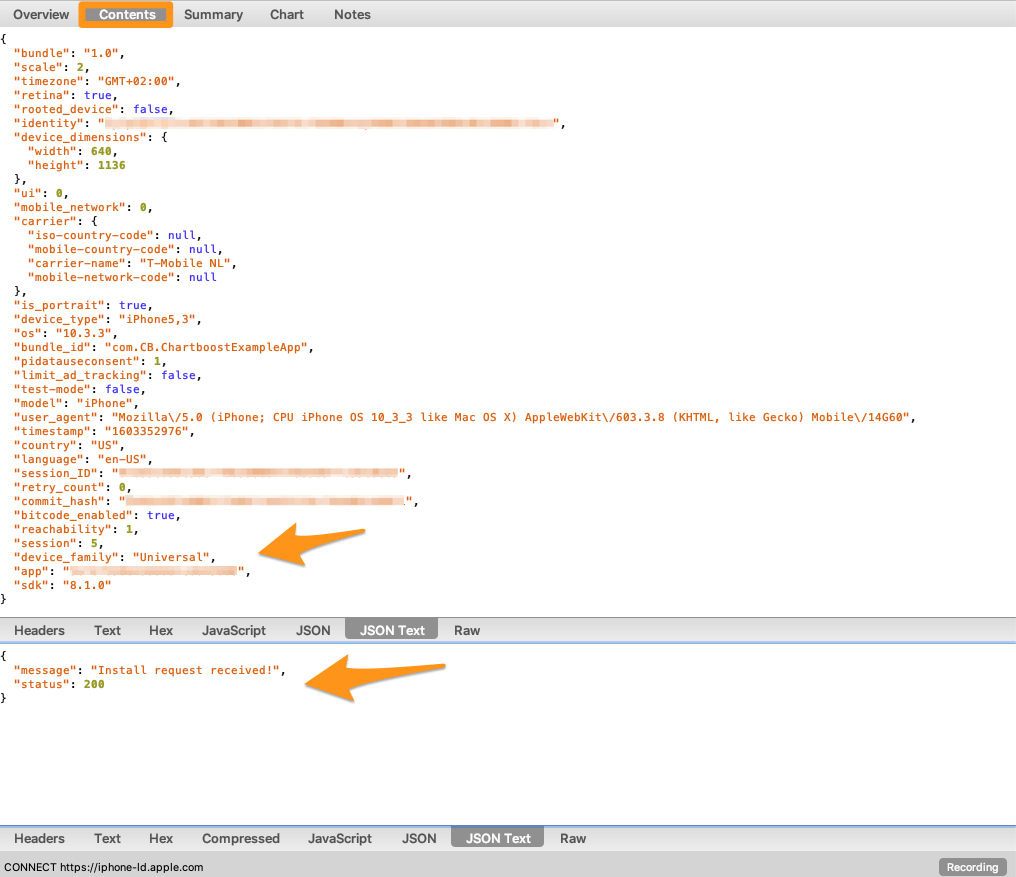
If you’re seeing a 4XX response, double-check your code for the right Chartboost App ID and App Signature.
You can also use Charles to verify successful interstitial calls; they’ll look something like this: